On a recent long weekend, I used 40 out of the 60Ah in my popup camper battery in a 3 day timespan. I’d like a bit more staying power, so I picked up a Renogy 100 watt, 12v solar panel kit (though mine came with brackets). It should allow me to stay on longer trips during family camping, go to firearms competitions, and last but not least: longer hunting trips in the fall when I use more power running the furnace.
Read about my other tent trailer upgrades here
Watt’s Included?

- A 100W Monocrystalline Panel (42.4×20.0×1.4″)
- Renogy Wanderer Charge Controller 30A (Good for up to 400W and compatible with lithium or general lead acid batteries)
- Mounting Z Brackets
- 8 Screws
- 4 Bolts
- 4 Z Brackets

- Renogy 20 ft Adaptor kit (2 Cables)
- Renogy 8ft Tray Cables (2 Cables)

Intended Use
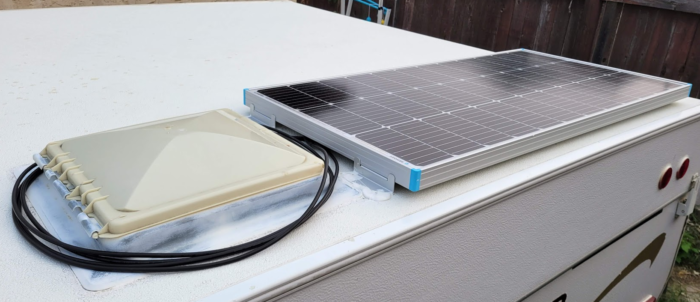
First, I’ll talk about my use case because it helped make a lot of my decisions for me. Largely, I wanted convenience, control, and I’m not after maximum efficiency. That was one of the reasons I went with a cheaper PWM controller instead of a pricier MPPT controller. After playing with the panel and seeing how minor the difference was between flat mounting it on the roof vs aiming it at the sun (20-30%), I decided to flat mount it. I didn’t want to haul a fragile panel around in my vehicle or in the trailer or deal with an adjustable bracket to angle the panels.
The solar panel should extend my boondocking power supply to unlimited, should make it easy for me to charge my battery when the tent trailer is parked at home, and I wanted quick setup.
The controller and wiring was going into an existing electronics cavity and I already have a battery monitor, so I didn’t need any visible equipment. Renogy’s Adventurer controller or one of their nicer MPPT controllers would be a better choice if you were going to make the devices visible.
Installation (Pop-up Camper)
1: Connect controller to 12v battery. I opted to connect on the other side of my monitor shunt so that I could see power going into the battery. This also gave me the ability to quick disconnect the battery since I’m using an SAE connector.

2: My roof is made of a 1/8 plywood ceiling, 1″ of foam, 1/8 plywood top, and thin aluminum sheet top. I didn’t like the screws that came with the kit because they didn’t seem like they’d hold to the super thin material. Instead, I opted to use Butyl tape to seal the holes and a little strip VHB tape in the middle for extra holding power and tri-fold rivets. In my testing, tri-fold rivets had really good holding power on thin material because of how wide they expand on the backside. Incidentally, these are the style of rivets used on airplanes for blind holes to hold aluminum sheet together, so it should work for my application. I slopped a bunch of self-leveling lap on top of everything for extra water tightness. It didn’t self-level.

The butyl tape squished down and then I got contact with the VHB tape and the roof for a bit of extra security.

This Camco self-levelling lap did not self level AT ALL.
4: To connect the solar panel to the controller I had a few choices. I could have run the wires inside the tent trailer, but I didn’t want to punch another hole in the roof and I wanted the ability to plug in and charge anytime I wanted: whether the trailer was popped up or down. So I decided to put an SAE connector on the outside and run the solar panel cables on the outside of the trailer. I used butyl tape on the connector to make it water-tight as well as a bunch of silicone on the inside to secure the cable.


I know that silicone on the inside looks gross but it’s just providing strain relief. The connector is screwed and butyl taped to the outside for waterproofness.

I haven’t decided whether I’m going to put a cable tie-down on the roof and leave them up there or disconnect the cables while in transit.
Renogy Solar Kit Pros
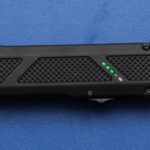
- Controller was very easy to setup. Hold the button down, then click until you get to the correct battery type. The LED indicators made it easy to figure out what was going on.
- Cables felt like they were high quality, z-brackets felt really good
- Packaging was appropriate for shipping, nothing arrived damaged
Renogy Solar Kit Cons
- Bad product description on website
- Controller description did not show if it could work with a lithium battery.
- The solar panel cables were only 12 gauge but advertised as 10.
- Battery terminal rings on the tray cables were kinda off-color like they were a bit corroded.
- Terminal screws on the controller were not quite a #2 phillips. They were shallow so you couldn’t put a bunch of torque into them (probably on purpose so you didn’t strip them out but still frustrating to use)
- No screws included to mount the controller (not a big deal)
Results & Conclusion
I had 1 OK day of sunlight and some results to share. With 1 day of the panel being plugged in and being partially shaded by a building, I still got 26AH of juice back into my battery. This is. . .way more than enough and I’m glad that I didn’t go for the 200 watt kit. Popup campers just don’t have a lot of power-hungry appliances (unless you screw up and use the 12V option for your absorbtion fridge instead of propane) so 26AH on a typical day will more than recover what was used.
If you use more power, the Renogy 200 watt kit is pretty good bang for the buck.