
Disclaimer: I’m no hunting shack construction expert. The shacks I’ve built have been made from scrounged materials and follow no logical building codes. When you build yours, please keep safety and your regional regulations in mind.
When you have a bit of private land that you can hunt on, one addition that I’ve found adds a lot of comfort to a hunt is access to a fixed, semi-permanent blind. They make it possible to hunt with young people, they make cold weather less of a problem, and they’re great for people who fidget. If you hunt public land, a portable ground blind is still a popular choice, but if you have private land and don’t mind paying for something quality, you buy an elevated ground blind. If you’re cheap (like me), you can build a hunting shack on your own from scrap material.

Wood Hunting Shack Design
I’m going to go ahead and assume you’ll be building out of wood, but steel can be used for a more solid base on an elevated blind. For design, you need to decide how big you want your floorplan. I have built them in 4’x4′ and 4’x8′ diameters, and I think the ideal size depends on what you want to do with it. A 4’x4′ floorplan is ideal for construction, because popular wood products comes in 8′ lengths and 4′ lengths are easily cut with very little waste. You can fit a swiveling office chair in a 4×4 floorplan, have enough room to swivel around and enough to store a few things. They’re not ideal if you want to hunt in pairs or bring a kid, and they’re a bit scrunchy getting in/out with winter clothes and a slung rifle. They’re also very tight to maneuver a bow around in.
A 4’x8′ enclosure, on the other hand, is a bit big. 1 person can no longer cover 360 degrees because one side will be too far. A 4×8 blind is much harder to keep warm, will be heavier to move into position, and will need more construction materials. On the positive side, they’re very roomy: someone could lay right out and take a nap in one, and you’d have no problem hunting with your wife or with kids, or with all of them!
A 4×6 or 5×5 floorplan would give just a little more room for storage, another person, or more room to pull a bow, but makes unusable waste if you’re using 8′ lengths of 2×4’s and/or 4×8 sheets of plywood.
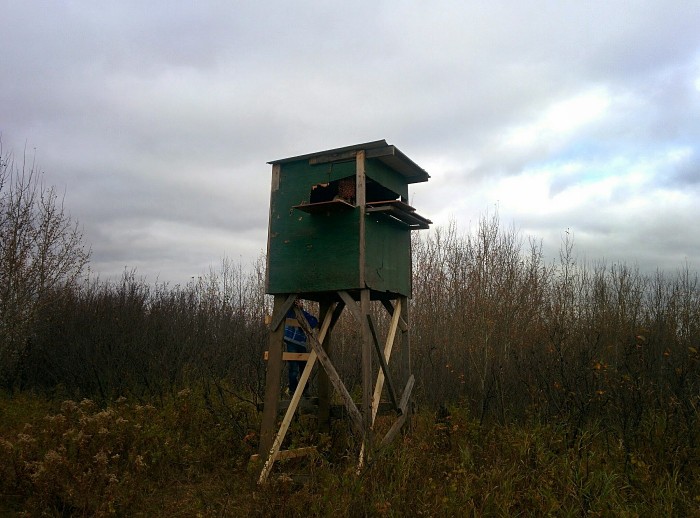
I elevate all my hunting blinds for 3 reasons:
- You can see more.
- Game animals are less likely to see you.
- It keeps mice and some other animals out.
For areas where game may be close, a higher blind will make your movements less visible. To keep blinds from blowing over, you can splay the legs out and make it more of a pyramid, or you can drive posts/stakes into the ground and tie the base down.
For the floor, you want it stiff, but light. I like the standard floor joist design with 16″ spacing, plywood top, and old carpet on top to muffle the sounds of movement inside. If you hunt in the rain/mud or places with high humidity, you may want to use a rubber mat or rubberized floor.
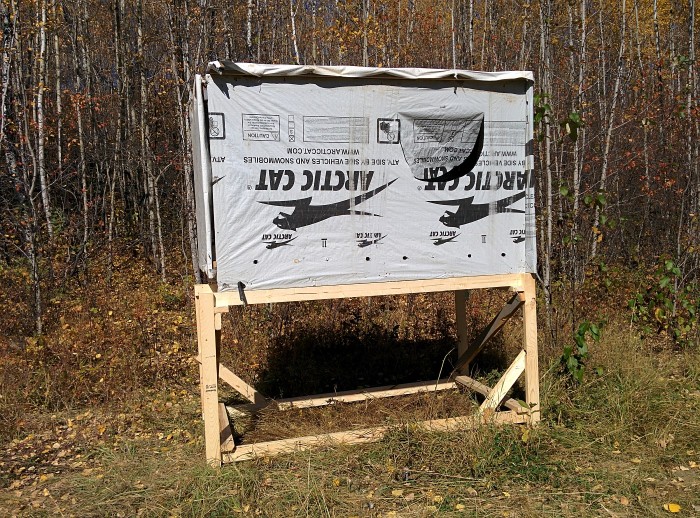
On walls, I use 2×4 studs to go up to the roof, and clad the outside wall with whatever I have handy. On most, this has been re-used painted plywood, but lightweight Tyvek wrap works too. I have yet to insulate any blinds yet, but may add rigid insulation if I can scrounge some up. Loose batt insulation will likely just get stolen by birds, or encourage some other unwanted animals to make a nest.
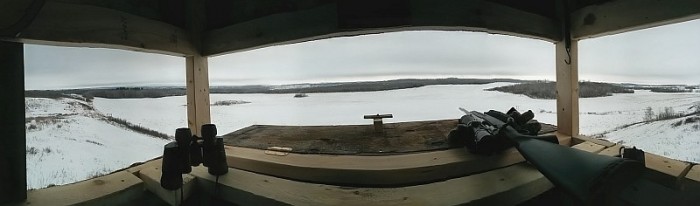
Windows are a bit tricky to get right, but where long shots are a possibility, I prefer the front window to lay out flat and make a solid shooting table. This is a disadvantage for bow shooting up close because it keeps you from aiming down, but it’s such an incredibly solid rest for those far rifle shots. Multiple windows make it easy to close ones where the wind is coming straight in, or where it’s unlikely to see any game.
For roofing, I usually use scrounged tin. It can make a bit of noise in the wind, but it’s maintenance free and light. An overhand over your main window will help keep the rain from getting in at you in a light breeze. Tin (and other roofing materials) need to be well fastened down so they don’t blow away in high wind. Don’t skimp on the screws when it comes to your roof.
Inside the blind, I add an office chair free off Kijiji/Craigslist, 1 or 2 hooks for hanging binoculars, and a 2×4 window ledge to place any other items I need to see. I haven’t found the need for shelving yet and in an evening hunt, the inside of a blind gets dark enough where it’s difficult to see anything that wasn’t sitting on a window ledge anyways.
A dedicated ladder is nicer to climb, but appropriately-spaced cross members along the legs work too.
Quick Tips:
- Pick up extra 2×4’s, and lots of nails and screws at a hardware store before starting construction.
- Try to keep it light so that moving the shack around afterwards is possible.
- Use the right nails, screws and lag bolts.
- Level raised enclosures using a level inside the enclosure on the floor.
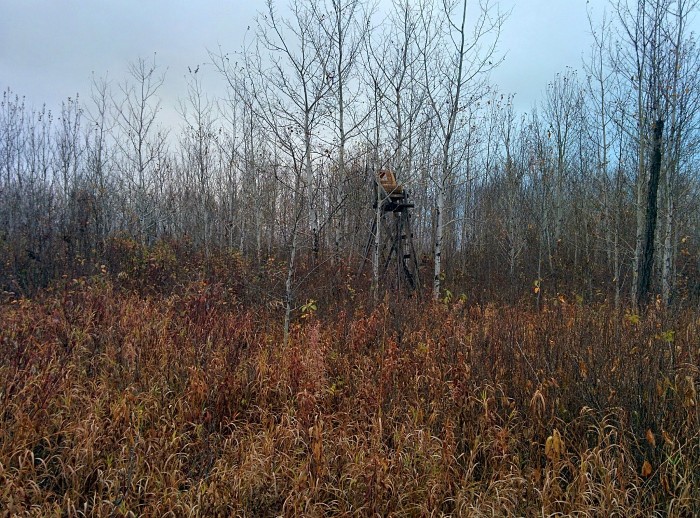
Unenclosed elevated blinds
While it is possible to make your own unenclosed, elevated blinds, I’m not entirely sure they’re worth it. A simple ladder tree stand is inexpensive and solid and a tripod stand is light and can be setup anywhere. That all said, I have an unenclosed, elevated blind that has a pickup truck bucket-seat at the top of a very stable setup of 2×4’s. It’s not fun to sit in when it’s cold, but I’ve had success with the bow in that stand.
Want to share pictures and construction tips about your hunting blinds? Found a fatal flaw in my construction? Share in the comments below, or send us an email.